Download your plugin. Don't open it.
- On the page you landed on after checkout, click the yellow Download my plugin button.
- Closed that page? It's in our email too: Your Accept Granted plugin is ready.
- It lands in your Downloads folder. Don't open it. Opened it by mistake? Just close that window.
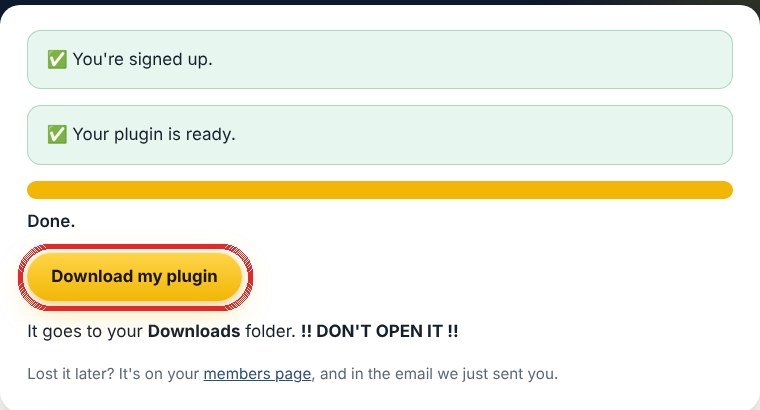
Yours may look a little different. That's OK.
Get Claude Desktop
- Already have Claude Desktop on this computer? Click Done, next.
- If not, click the yellow button below. Pick Windows or Mac.
- Open the file it downloads. Click through the install.
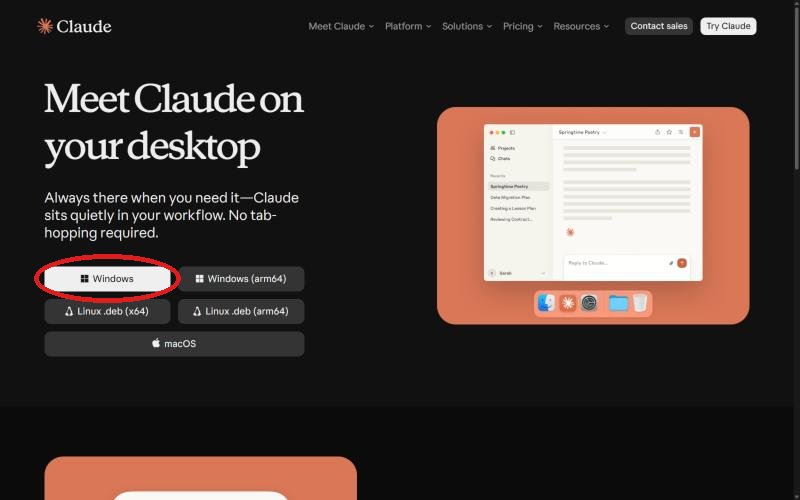
Yours may look a little different. That's OK.
Open it and sign in
- Windows: press the Windows key, type Claude, press Enter. Mac: press Command and Space, type Claude, press Return.
- Sign in with the same account you use at claude.ai.
- You're in when you see New, Projects and Customize on the left, and a message box.
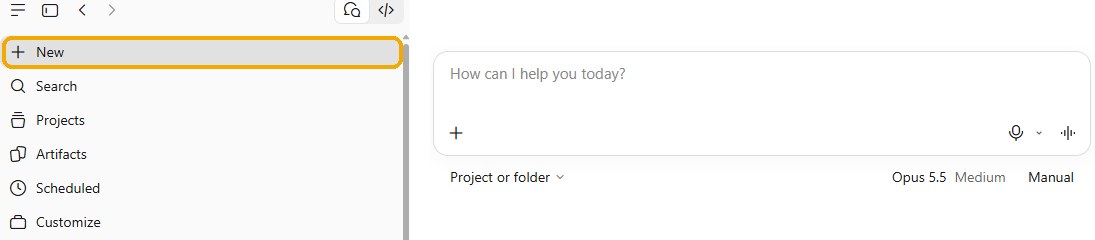
Yours may look a little different. That's OK.
Pin it
- Windows: right click the Claude icon on your taskbar. Click Pin to taskbar.
- Mac: right click the Claude icon in your Dock. Click Options, then Keep in Dock.
- Now it's one click away every day.
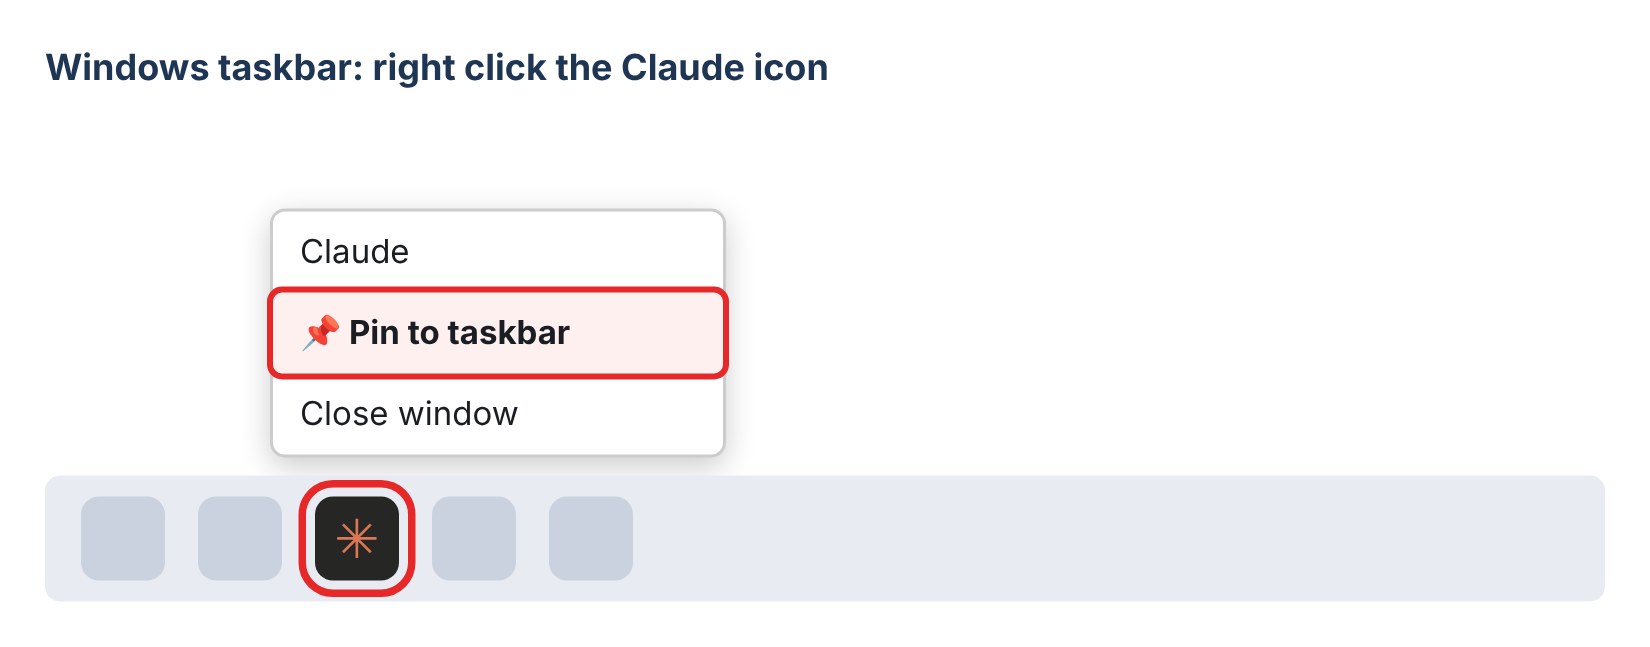
Yours may look a little different. That's OK.
Add the plugin
- On the left, click Customize.
- At the top, click Plugins.
- Click + Add at the top right. Then click Upload plugin.
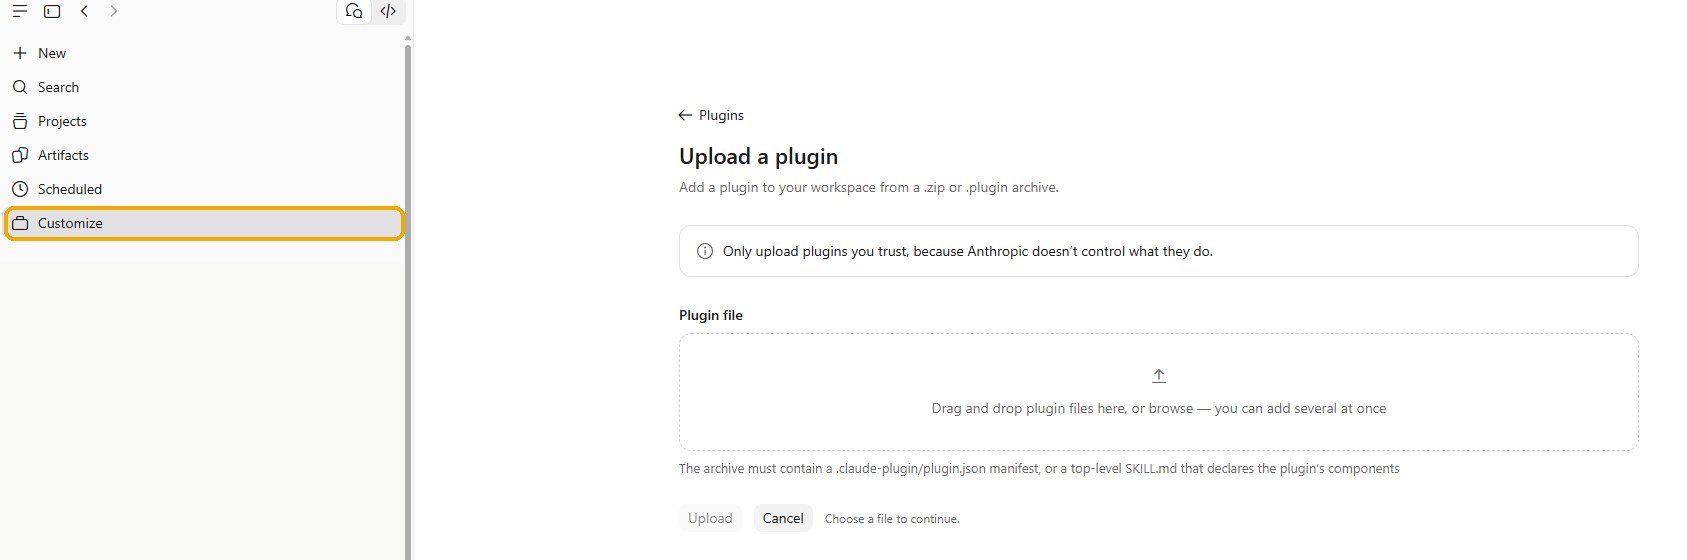
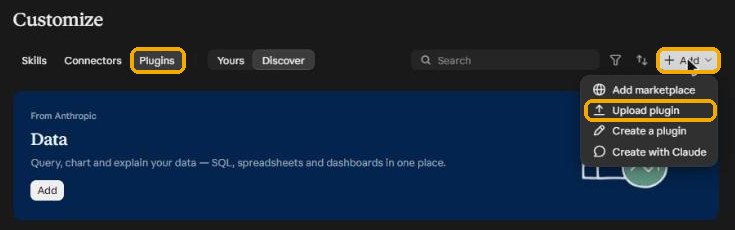
Yours may look a little different. That's OK.
Click browse and pick the file
- In the box, click the word browse. A window opens.
- Open your Downloads folder. Don't see it on the left? Look under This PC (Windows) or in the Go menu (Mac). Saved it to your Desktop? Open Desktop.
- Click the newest Accept Granted plugin file, then Open. Then click Upload.
- It worked when Accept Granted shows in your Plugins list.
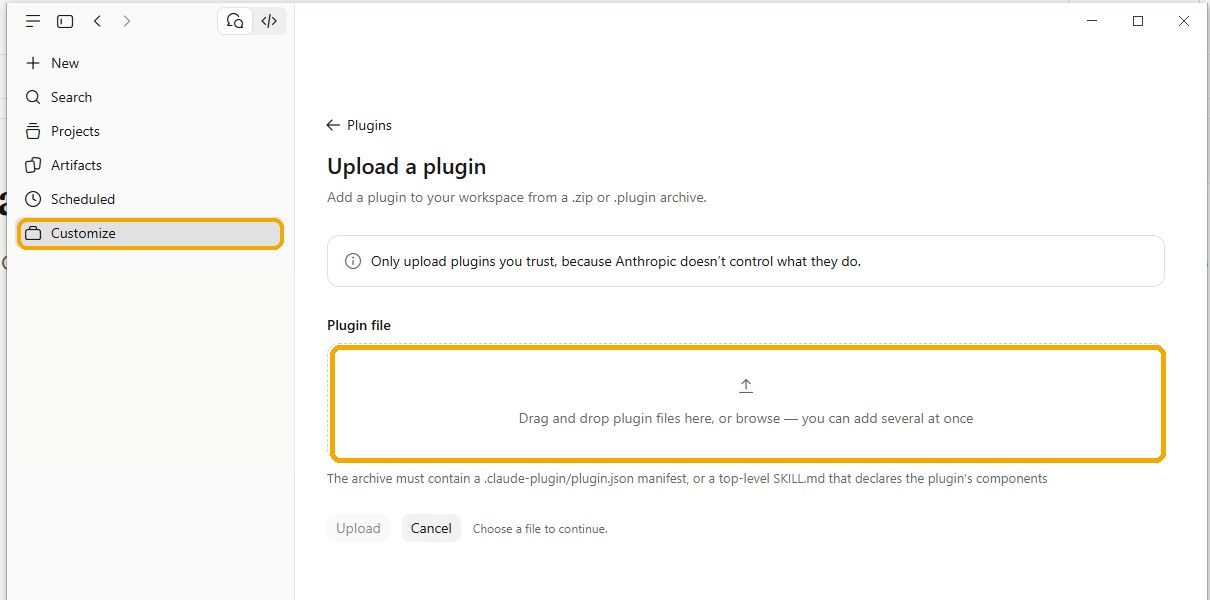
Yours may look a little different. That's OK.
Make your Project
- On the left, click Projects, then New project.
- Name it Accept Granted.
- Paste the line below as the description. Click Create project.
Copy this on your computer:
My job search with Accept Granted. Use the Accept Granted plugin. Go one step at a time.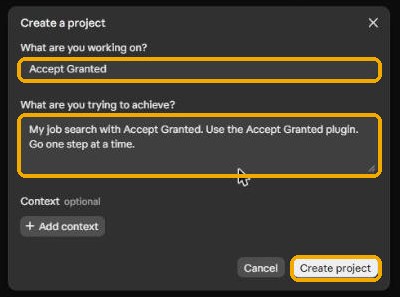
Yours may look a little different. That's OK.
Add the Project instructions
- On the right side of your Project, find Instructions.
- Click Add next to it. Paste the same line. Click Save.
- Already see it there? Skip this one.
Copy this on your computer:
My job search with Accept Granted. Use the Accept Granted plugin. Go one step at a time.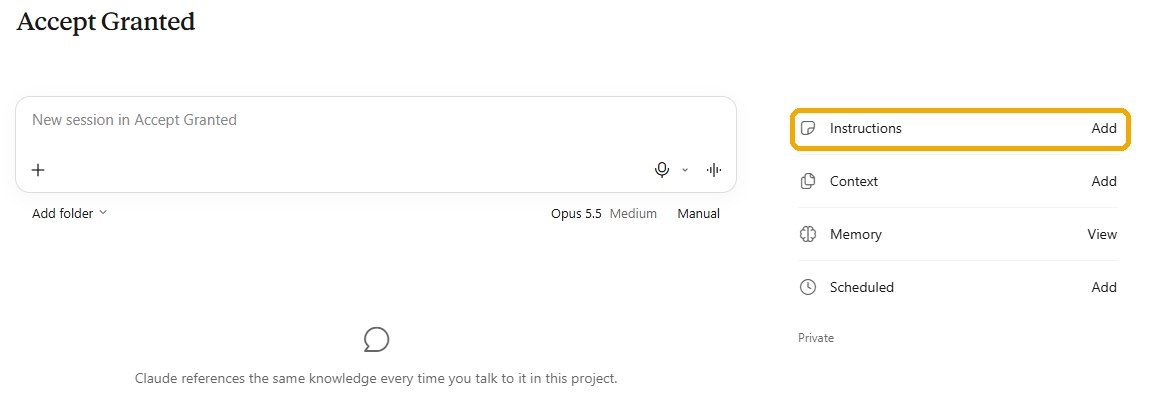
Yours may look a little different. That's OK.
Start your chat
- Under the message box, find Manual. Click it and pick Auto.
- Click in the message box. Paste the start line below.
- A list may pop up. That's fine. Press Enter once to pick start, then press Enter again to send.
- Claude says hello and walks you through the rest. You're done with the slides.
Copy this on your computer:
/accept-granted:start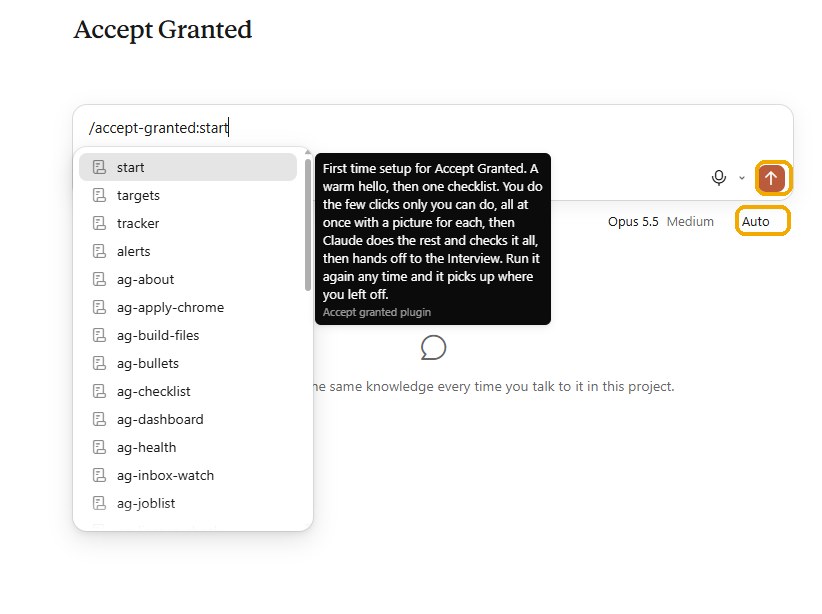
Yours may look a little different. That's OK.